Managing Records in GTR
Included below are instructions on how to update, copy, delete, and download test records in GTR.
How to update your records in the GTR
Follow these steps to update a record in the GTR:
Login
See instructions here to login to the GTR Submission Portal.
Updating laboratory records
Updating a laboratory record which has already been submitted
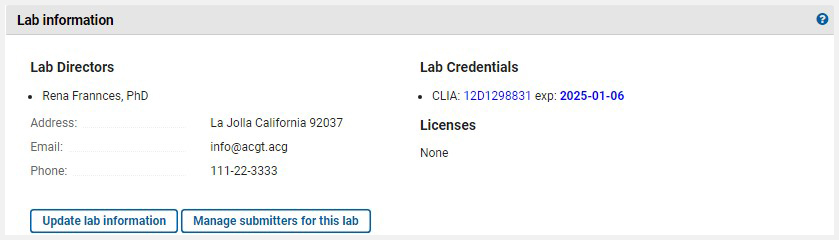
From the home page for your lab, in the section Laboratory Information, click on the button 'Update laboratory information' to access your laboratory record. The laboratory name at the top of the submission home page and the menu item 'Laboratory information' also link to this page.
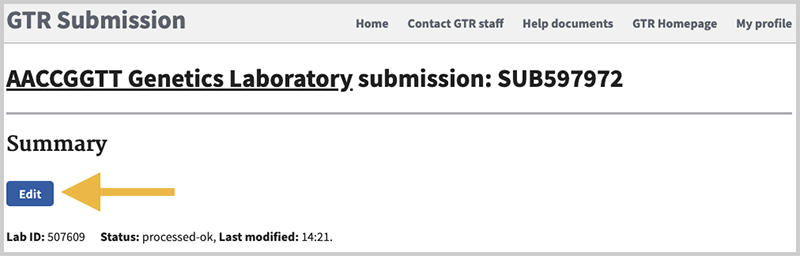
Each link will take you to the overview report of your submission, where you can review your data and verify current content. If you wish to make an update, click the Edit button.
All tabs are available for navigation. Go to the sections where you need to make changes by clicking on the respective tab. Once you have made the changes, be certain to click on Save and Continue at the bottom of the form when you are done. On the lab overview page, be sure to click the Submit button.
Updating a lab record for which the submission is still in process
If you have not completed a submission, click on Edit lab Submission from the home page in Submission Portal. The link will lead to the page in the record where the submission was last updated. In the example below, the processing of the record was stopped at the Lab information stage.
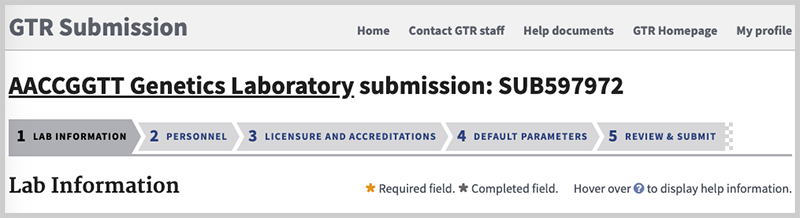
Go to the sections where you need to make changes by clicking on the respective tab. Once you have made the changes, be certain to click on Save and Continue at the bottom of the form when you are done. On the lab overview page, be sure to click the Submit button.
Updating test records
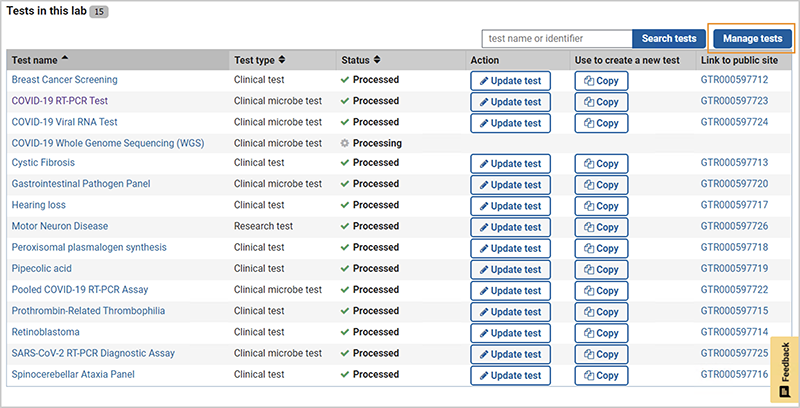
From your homepage in the GTR submission site (see login instructions), you will see the section 'Tests in this lab'.
Included file '/gtr/docs/lab_tests_include.md' not found
Alternate access to test and lab submissions
Click My Profile located in the navigation menu of the submission homepage. Click on My Submissions. In the table below, you will see a list of your submissions. You can click on the submission ID to go directly to the test page.

How to delete records in the GTR
Delete test records
You can delete clinical and research tests in GTR from your lab's overview page.
-
Log in to the GTR submission Portal (https://submit.ncbi.nlm.nih.gov/subs/gtr/).
-
On the home page for your lab in the GTR Submission Portal, go to the section Tests in this lab, and click on 'Manage Tests'. This opens a page which shows the list of tests in the Test management tool.
-
In the Test Management Tool, select the tests to be deleted.
-
Click 'Action for selected tests' above the filters table and select 'Delete tests'.
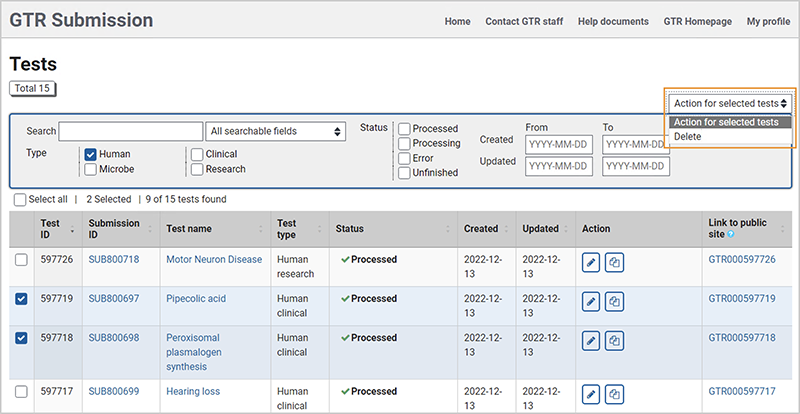
-
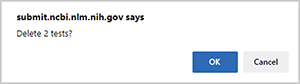
You will get a prompt to confirm that you wish to delete the tests.
Delete a laboratory record
If you want to delete a laboratory record from the GTR, please contact GTR staff.
The 'Copy' Feature
The 'copy' feature enables submitters to seed a new test submission by duplicating the information from another test that has already been submitted.
Making the copy feature work for you
Specify a new, unique test name to clearly distinguish the copied test from the original. Delete or edit information that is automatically copied to the new test if it is specific to the original test. Ensure tests are not exact duplicates of each other by carefully reviewing the copied fields such as condition names, test targets and methodologies.
Examples where the copy feature may be useful:
- A submitter enters test information for a sequencing test for the L1CAM gene and submits the test. The submitter uses the copy feature to create a new test submission. A new, unique test name is entered. The test method is changed to duplication/deletion analysis. The analytical validity statement is revised. The time required to register the second test is reduced.
- A submitter enters and submits a panel test that assesses 5 genes by sequence analysis. The laboratory also offers 5 tests, each of which evaluates one gene at a time. The submitter copies the panel test 5 times. Within each of the 5 copied tests, the test target is changed to represent only the single gene being assessed (the other 4 are deleted). Other relevant fields are edited (as appropriate) to reflect each specific test, such as test name, condition name, analytical validity statement, methodology, order code, etc. This allows for efficient entry of 6 tests in total.
Availability of copy feature
- Available only for submitted tests. Test that are in Edit mode cannot be copied.
- Available for both clinical and research tests.
- Clinical and research tests can be used to seed the same type of test but cannot be used to seed a different type of test (clinical tests cannot seed research tests, or vice-versa).
List of fields that are NOT copied into a new test registration page:
Clinical Tests
Laboratory Test Name
Short Test Name
Manufacturer's Test Name
Test Order Code
Default parameters
Research Tests
Laboratory Test Name
Short Test Name
How to Copy a Test
Log into the laboratory's submission homepage (See information on accessing and logging into the GTR submission site.
1. Go to the GTR Submssion home page
In the section 'Tests in this lab', click on 'Manage tests' to go to the Test management page.
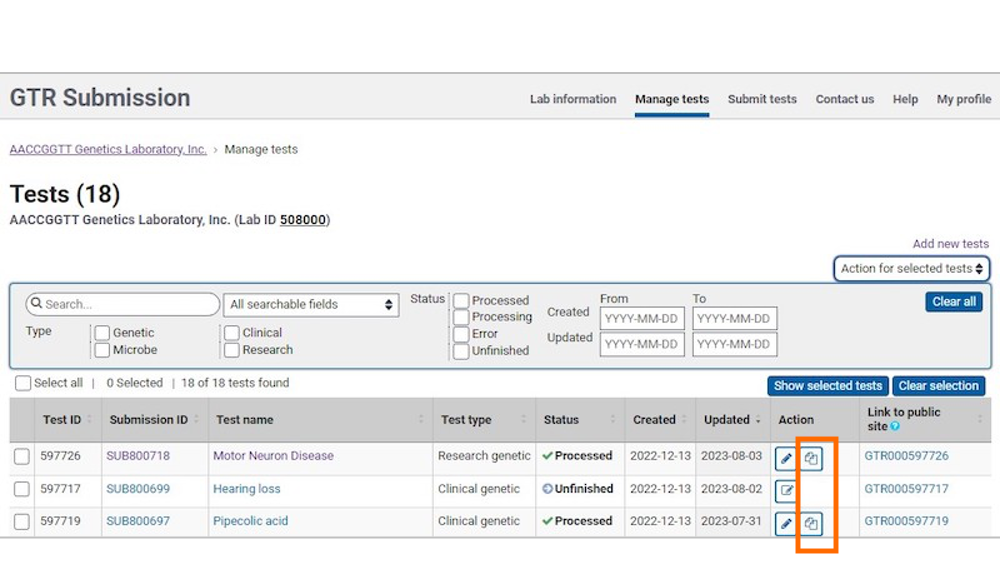
2. Copy the test
In the table, locate the test you want to copy. In the Action column, you will locate the copy icon. Click the copy icon to copy the test.
To copy data from a submitted test into a new test registration, click the 'copy' link.
3. Complete the copied test
After clicking the 'copy' link, you will be taken to the Basics tab of the newly copied test. Data from the original test will automatically be populated in this new test, with the exception of the fields listed above. All fields in the new test can be edited, including those that were copied. Pay special attention to fields that may be specific to the original test and either edit or delete the information.
NOTE: At a minimum, the 'Laboratory Test Name' field must be completed in order to submit the new copied test.
4. Submit the test
We highly recommend you review all tabs before submitting your copied test.
Tests are not processed until the 'Submit' button is clicked on the test 'Review & Submit' tab.
Once the copied test is submitted, it can be copied as well.
Manage Tests
OMB NO: 0925-0651
EXPIRATION DATE: 01/31/2025
On the home page for your lab in Submission Portal, go to the section Tests in this lab, and click on 'Manage Tests'. This opens the test management page, showing a table with the tests for your lab. Above the table is a panel to enable searching and filtering.You can narrow down your test list by searching for specific terms in a subset of test fields, or filtering by test parameters and dates. In this tool, you can update tests using the submission wizard, copy and delete tests, perform a bulk submission using the submission wizard for a subset of test fields, and down the data in spreadsheet format for select tests
Test Management Tool
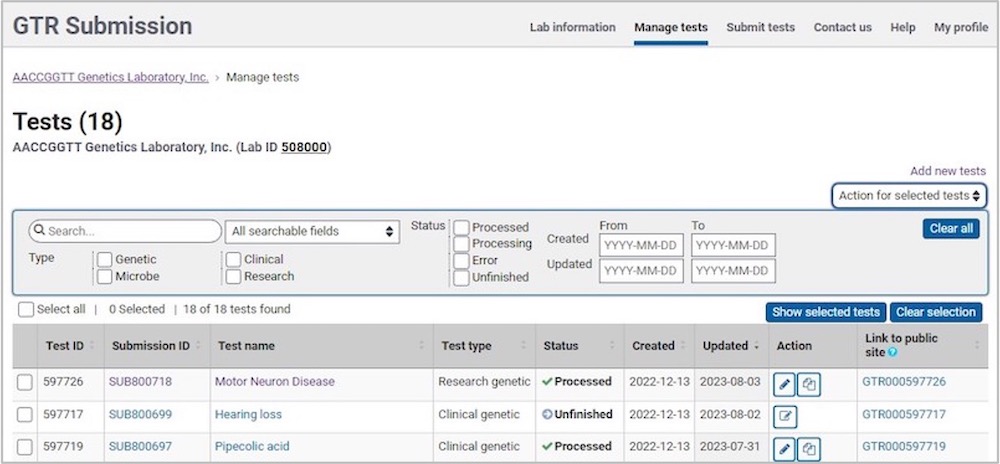
Test Table
The test table shows the following headers:
- Test ID
- Submission ID: Click on the link to open the test in the Submission Portal
- Test Name: Click on the link to open the test in the Submission Portal
- Test Type; values are:
- Human clinical
- Human research
- Microbe clinical
- Microbe research
- Status; each test will show one of the following:
- Processed
- Processing
- Error
- Unfinished
- Created: Shows the date the test was created in GTR
- Updated: Shows the most recent date of either the updated date for the test or the date of the annual review for the laboratory
- Actions; icons allow for the following functions:
- Edit test. This will open the Submission Portal page for a test in a new tab. Click 'Edit'. Be sure to step through each tab of the test and click 'Submit' on the 'Review & Submit' page.
- Continue editing (for unfinished tests). This will open the Submission Portal page for a test in a new tab. Be sure to step through each tab of the test and click 'Submit' on the 'Review & Submit' page.
- Copy test. This will open the Submission Portal page for a test in a new tab. Provide a new name for the test and make the necessary changes. Be sure to step through each tab of the test and click 'Submit' on the 'Review & Submit' page.
- Link to public site: Click on the GTR test accession ID to go to the public site for the test
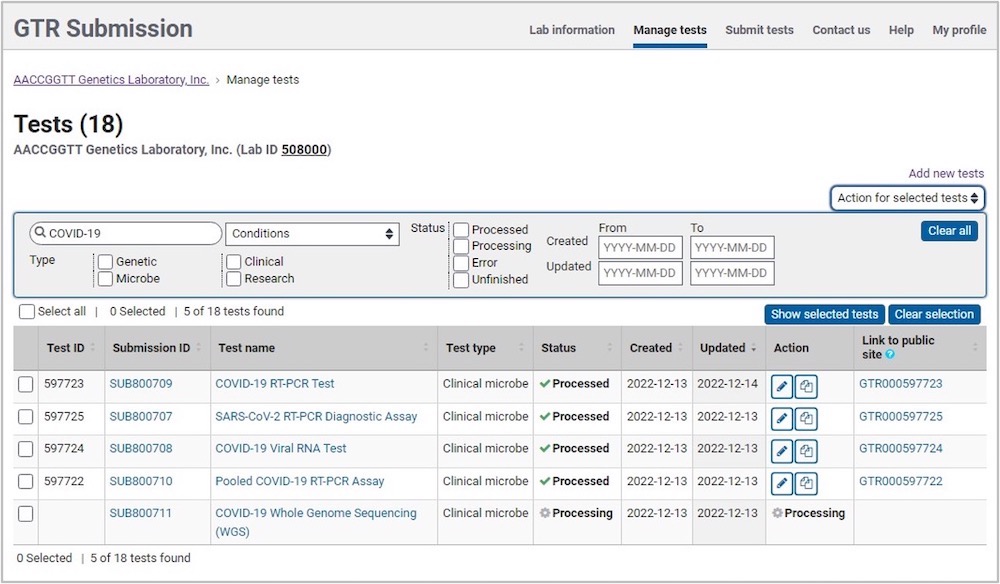
Search Tests
Use the search box to enter a term and select the field to search. The list of tests will include those that have the term in the field option selected, and the counts for the tests that have the term will be displayed. The 'Clear all' button will clear the search term from the search box as well as any filters and restore the test count to the original count. You can search tests by the following test attributes or parameters:
- All searchable fields
- Order Code
- Submission ID
- Test accession
- Test ID
- Test name
- Test-specific contact person
- URL-How to order
- URL-Specimen source
- URL-Test
- URL-Test codes
- Conditions
- Genes
Filter Tests
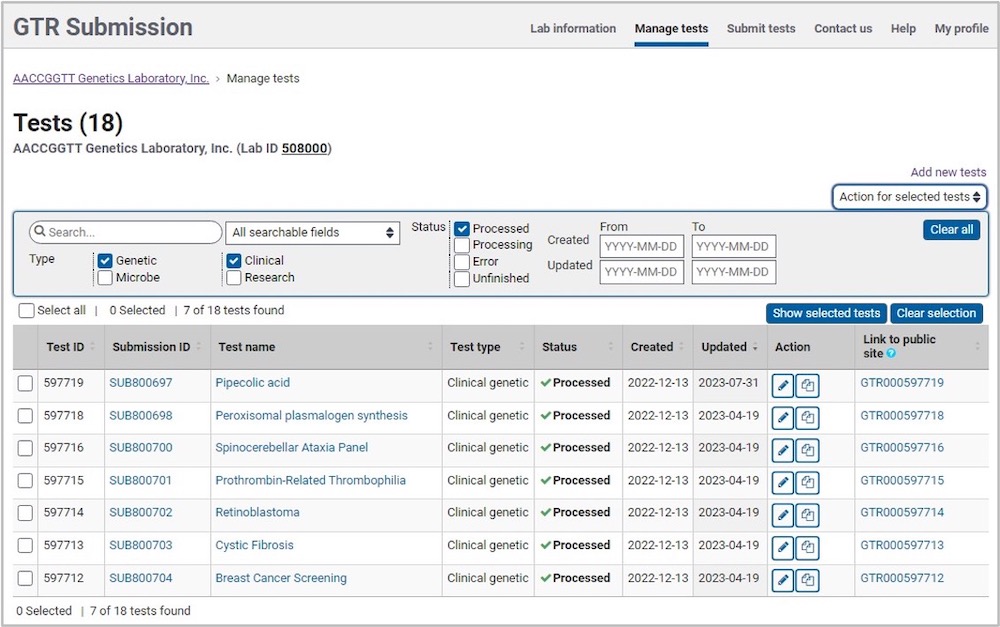
Use the search box to enter a term and select the field in which to restrict your search. The list of tests will narrow to those within the selected parameters and the counts for the tests that have the term will be displayed. The 'Clear all' button will clear the search term from the search box as well as any filters, and restore the test counts to the original count. Filter the test list by the following test attributes or parameters:
- Test attributes:
- Human or Microbe
- Clinical or research
- Status; each test will show one of the following:
- Processed
- Processing
- Error
- Unfinished
- Date range:
- Created
- Updated
Select Tests
Check the box for 'Select all' to select all tests; you can uncheck the box to remove the selection. You can also select individual tests. The selection will be preserved even if the filters are removed. Once you have selected tests, you can proceed to perform an action on the selected tests.
Perform action for selected tests
Available actions on selected tests are:
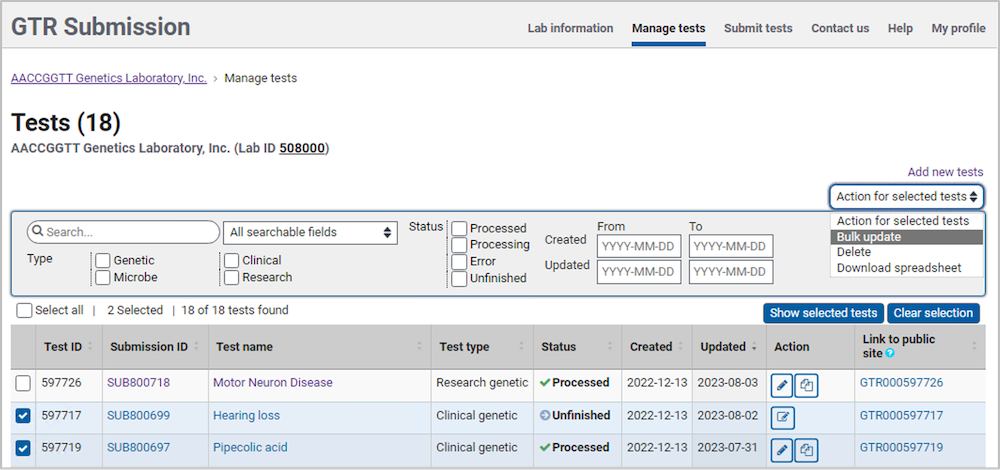
- Bulk update
- Delete
- Download spreadsheet
Bulk update
With the bulk update feature, you can edit multiple tests in the wizard at the same time for select fields. More details about this feature are here. See details about the bulk update feature.
Delete
Once you have selected tests, click 'Action for selected tests' above the filters table and select 'Delete'. You will get a prompt to confirm that you wish to delete the tests.
Download spreadsheet
Selected tests, then click 'Action for selected tests' above the filters table and select 'Download spreadsheet'. A spreadsheet file will be saved to your downloads folder.
You can use the data in the spreadsheet to submit updates to the tests. Once you have updated your spreadsheet and are ready to submit, go to the Submit Tests page to upload your spreadsheet. For instructions about completing your spreadsheet for submission, see clinical genetic tests spreadsheet submission or clinical microbe tests spreadsheet submission.
Instructions for labs to download their previously submitted clinical test data
Submitters with access to their laboratory's GTR data can download an Excel file containing all submitted data for their registered clinical tests. The excel file contains columns for all clinical test fields (whether completed or not) and can be used to:
- edit current clinical tests
- add new clinical tests*
- delete current clinical tests
*Alternatively, use a blank template to add new clinical tests.
For instructions on how to download and use the spreadsheet submission template, as well as how to download all previously submitted clinical test data, see the following documentation: Clinical human genetic tests by spreadsheet submission Clinical microbe tests by spreadsheet submission
The test data download feature is not available for research tests.