

Sequence Markers
Sequence markers may be useful for reporting coordinates and creating displays of the graphical viewer with points of interest highlighted. This page provides instructions for setting, modifying, and accessing information about sequence markers. Refer to the Marker demo page for interactive examples of markers in the graphical sequence viewer.
Set a Marker
Set a marker at a single position
Right click anywhere in the graphical panel to reveal a context menu. Select the option "Set New Marker At Position”. The marker dialog includes options to specify the name, position, and color of the marker. A marker can also be locked in place to prevent inadvertent changes (see below for more details).

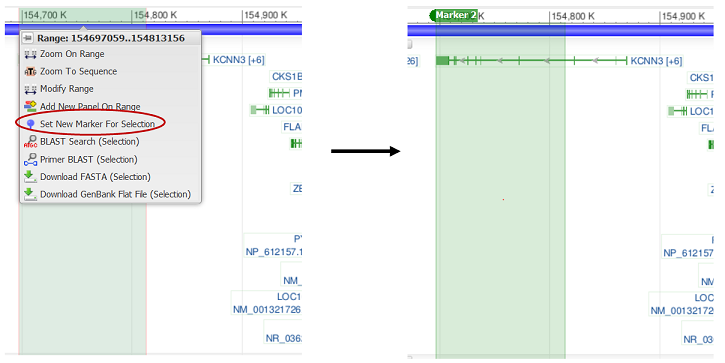
Set a marker on a sequence range
When a sequence range is highlighted (via clicking and dragging on the ruler), a range selection menu appears. This menu includes the option to “Set New Marker For Selection”, which creates a colored highlight in the selected range.
Marker Options Menu
Clicking on the marker title reveals a menu with options for the marker, including to rename, change the color and location, remove, and lock/unlock the marker. A locked marker will show a “lock” icon (see arrow in image below). An unlocked marker can be dragged to a different location in the graphical viewer.

Marker Details
Clicking on “Marker Details” in the marker menu reveals a panel with additional information at the position of the marker, include the HGVS name and location relative to the top level assembly (e.g. NC_000011.10) and annotated transcripts or CDS. The DNA/RNA or protein sequence context is also reported.
Details for all markers will be shown. Markers may be added, removed, or edited from the Marker Details panel.
The Marker Details table can be downloaded in CSV format via the Download button at the bottom right of the panel.
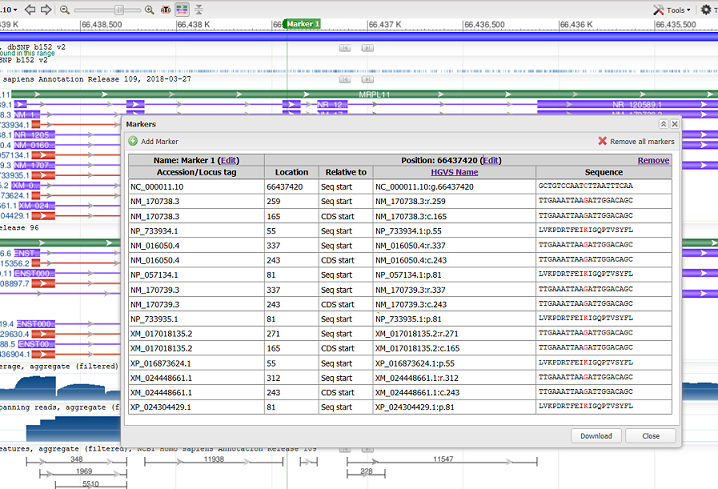
Table of Contents
- Sequence Viewer application
- Documentation Home
- General
- Help
- Interface
- Tutorials
- Manuals
- Demo pages
- Related Resources