

Navigating the Sequence Viewer
This page describes ways to navigate and access the functions of the graphical sequence viewer.
- Options for Panning the Display Left-Right
- Options for Zooming the Display
- Zoom slider with Zoom in and zoom out buttons
- Zoom to Sequence
- Select or Zoom on Range
- Go Back (return to previous range)
- Flip Strands
- Jump between features within a track
- The Context Menu
Refer to our complete documentation for more information about the graphical view panel and track configuration.
Options for Panning the Display Left-Right
Pan arrows
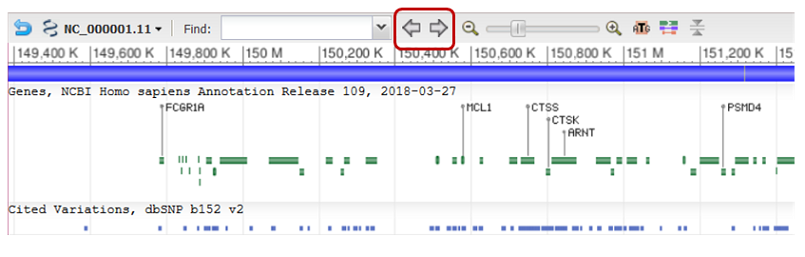
You can move the view to the left or right by using the left or right arrow buttons on the toolbar, respectively.
Pan by dragging
You can also move the view to the left or right by clicking and dragging within the graphical sequence panel.
Options for Zooming the Display
Zoom slider with zoom out and zoom in buttons
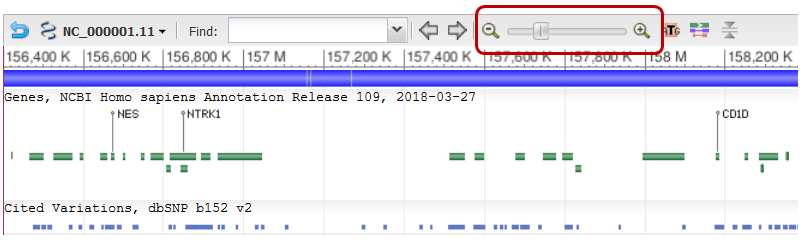
You can zoom in or out on the visible range by dragging the zoom slider to the left or right. Clicking on the magnifying glass buttons at either end of the slider zooms in or out by a factor of two.
Zoom to Sequence
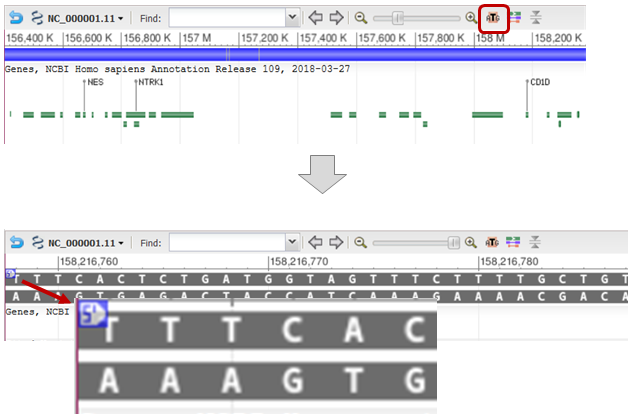
You can zoom directly to the sequence level in the center of the visible range using the zoom to sequence button (red box on image above).
When the viewer is at the sequence level, the orientation is indicated by the 5’ notation circled in blue at the ends of the sequence (indicated in inset image).
Select or Zoom to Range
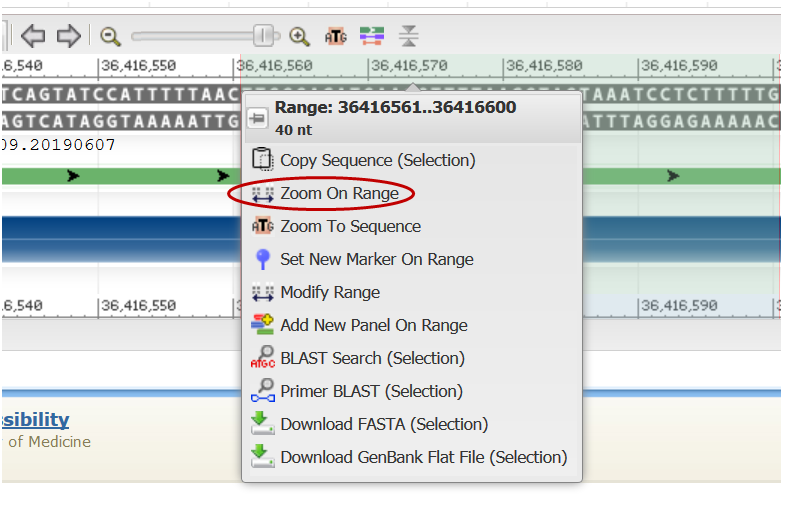
You can select a range by clicking and dragging within the ruler, or alternately, by pressing the Ctrl or Command (on Mac) key and dragging your cursor anywhere within the graphical display. Multiple selections can be made using the Ctrl/Command key. You can clear all selections by clicking within the ruler.
When a range is selected, a menu appears that contains the option to “Zoom On Range ”. You can also choose the option “Zoom to Sequence”, which zooms the view to the sequence level in the center of the selected range.
The “Copy Sequence (Selection)” option is available on the selection menu when the view is zoomed to where the sequence is visible. This option copies the selected sequence to the computer clipboard. The sequence string will be copied in the 5’ to 3’ orientation without a header. The “Copy Sequence (Selection)” option will not be available when the view is zoomed out from the sequence.
The selection menu also includes options to set a marker on the selected range, send the selected sequence to NCBI BLAST, and download the selected sequence range in FASTA or GenBank format.
Go Back (return to previous range)
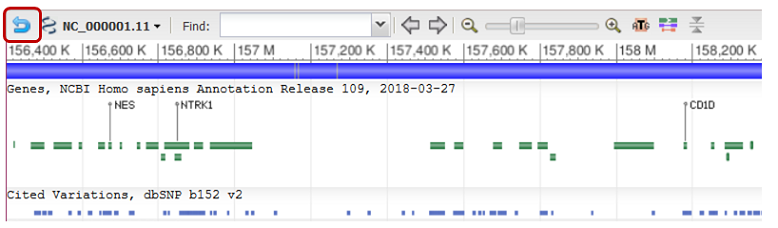
The back button returns the graphical sequence viewer to the last displayed coordinate range or zoom level.
Flip Strands
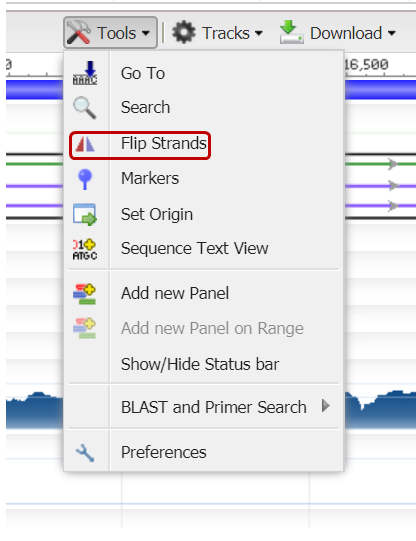
The orientation of the sequence can be reversed by accessing the “Flip Strands” option located under the Tools menu. The orientation can be confirmed by examining the direction of the coordinates on the ruler.
Jump between features within a track
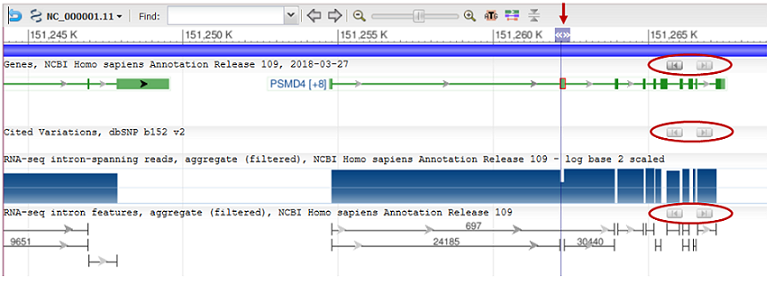
You can navigate through visible objects in a track by clicking the navigation buttons (grey “jump” arrows, circled in the image above).
Clicking on either of these buttons sets a vertical marker line (indicated by red arrow) at the end of an object or feature in the visible range. Subsequent clicks on the left or right arrows moves the marker to the next object boundary to the left or right.
For example, in a gene track, clicking on the arrows will move the marker along exon-intron boundaries. Pressing the “Ctrl” button while clicking on the arrow skips through the internal exons of a multi-exon gene or through the segments of a multi-segmented alignment.
Navigation buttons are only available on tracks with discrete features and are not available on graph tracks.
The Context Menu
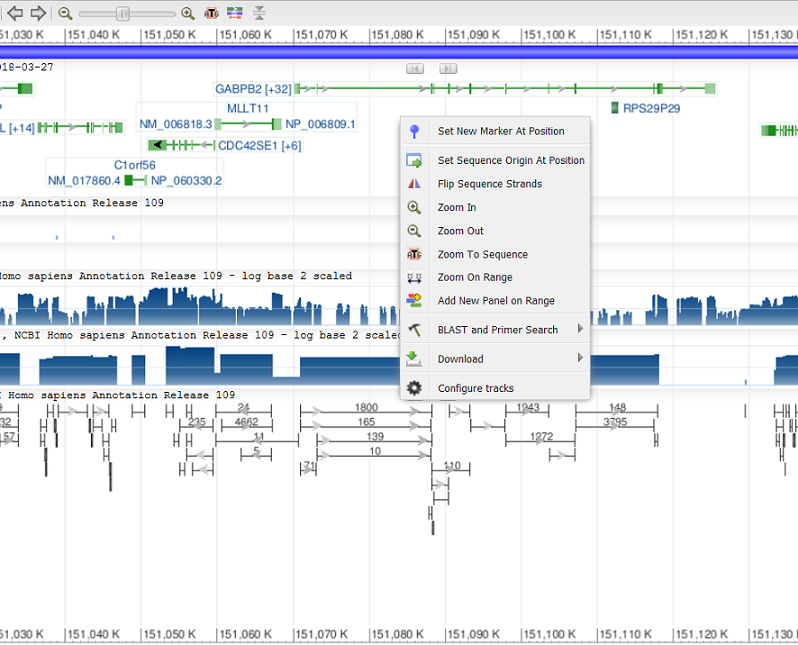
A “right-click” (or pressing on the screen) anywhere within the graphical viewer will open a context menu.
This menu contains a variety of options for manipulating or navigating the display.
Table of Contents
- Sequence Viewer application
- Documentation Home
- General
- Help
- Interface
- Tutorials
- Manuals
- Demo pages
- Related Resources